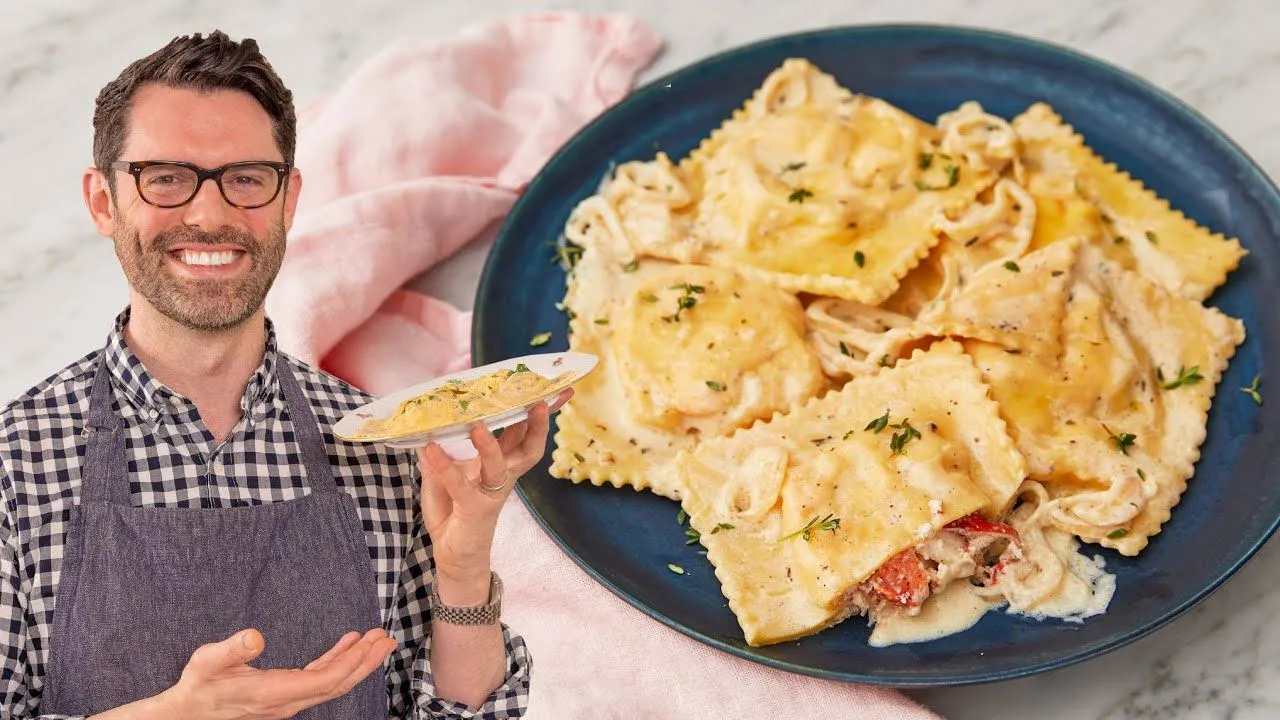
Amazing Lobster Ravioli Recipe
Hey, I’m John Canel and today we’re making an indulgent, delicious lobster ravioli, so let’s get started.
Prep Work
First off, there’s a little bit of prep work. I have three cloves of garlic minced. I also have 12 oz of precooked lobster, but if you’re buying raw lobster you can prepare it so easily: just cut down the spine of the tail and pop that into the oven for a few minutes and drench it in butter, set it aside to cool and it’ll be perfect.
Two Ways to Make the Ravioli
Lobster ravioli seems so fancy and it’s beyond delicious, but it’s actually really easy. I’m going to show you two different ways to make this: one with store-bought wonton wrappers and one with fresh pasta dough. For this recipe you’ll need 12 oz of cooked lobster meat. I’m going to give it a chop really quickly. You can go to the store and buy cooked lobster meat or you can get lobster tails and just broil them for 6 to 12 minutes—just like with shrimp you’ll see them go from translucent and grayish to being pink and more opaque. They’ll also be a bit firmer. I would err on the side of under-baking them because they’re going to get boiled too, so you don’t want them to be too firm.
Chopping the Lobster
We want smaller pieces because they have to fit into our raviolis, so we can use tails and claws for this—really any lobster meat will be delicious. Nice small pieces just like this. If you’re not a lobster fan but you’re reading this anyway—thank you, I appreciate that—but here’s the deal: you could use crab for this or you could use seared scallops too. In fact, if you wanted to, you can even do a medley of all of those things; they have similar textures and they’re flavors that play really well together.
Making the Filling
Into a big bowl we’re going to add all of our delicious lobster meat, 1 cup (250 g) of whole-milk ricotta, 2 teaspoons of lemon zest, ¾ teaspoon of salt, and ¼ teaspoon of freshly cracked black pepper. Stir this together; the ricotta will be the suspension that everything else is floating in. Once it’s all stirred together, give it a taste to check the seasoning. I’m adding a pinch more salt and just a little bit more lemon zest. If you wanted, you could add some herbs in this filling, but we’re going to have our herbs in the sauce really amping up the flavor.
Fresh Pasta Dough Method
Pop the filling into the fridge while we roll our pasta dough out. My pasta dough has rested—look at this beautiful color from the yolks of the eggs. Using my hands I’m going to stretch this into about a quarter of an inch thick square. Loosely cover your pasta dough while we work with one sheet, and keep some semolina at the ready to sprinkle occasionally so the pasta dough doesn’t stick.
Lowest setting, widest roller: feed this through twice each time, then go down one notch until we get to eight; it should be nice and thin. It’s important to start on a low setting and work your way up slowly so the pasta is just getting massaged into place instead of forced. Towards the end your pasta is going to start getting really long and almost transparent. Add a little more semolina flour as needed.
I rolled one more piece out and did a little bit of tugging so they’re exactly 6 in wide for both pieces. Using a pizza cutter, trim a little excess so they line up nicely.
Filling and Sealing Large Sheets
Grab about 1½ to 2 teaspoons of filling per mound. You want about an inch border all the way around, so space your little dots of filling about 2 in apart. Work on a little assembly line and we’ll fold that big piece over. The enemy of ravioli makers is air bubbles—you don’t want a big bubble that expands while it’s boiling and pops the ravioli open.
Use a brush and some water to paint the edges; this will glue everything together. Pat the filling down just a bit and shape it so there are no pockets where air can hide. Carefully lift the other piece of pasta and place it over the top; gently press together and get all the air out. If you paint yourself into a corner and the air has nowhere to go, just poke a little hole where you’ll be cutting the ravioli to press the air out. Cut with a knife, pizza cutter, or ravioli cutter right down the middle. These can hang out on the counter and dry out a bit—it actually helps the texture.
Wonton-Wrapper Method
Open your package and unwrap some wonton wrappers; keep them covered with plastic or a paper towel while you work so they don’t dry out. Fill each with about 2 teaspoons of the filling, mindful of air pockets, and give them a good border. Press down a little so it’s not too big of a mound. Brush the border with water—just enough to seal—place the second wrapper on top, press to seal, and push any air out. Work in batches so the wrappers don’t dry out and crack.
I think the easiest way if you’re just starting out is to do them in your hand; it gives really good control of the sealing process. Seal the edge on one side, press the air out, and seal together.
The Creamy Wine Sauce
The sauce comes together super fast, so bring some water to a boil slowly so it’s ready when the sauce is. I’m making a half portion of sauce; if you want all the ravioli together, double the recipe.
- 2 tablespoons butter
- 2 shallots
- 1 cup cream
- 1½ cups dry white wine
Chop one shallot thinly. Over medium-high heat, add 1 tablespoon of butter into a large pan. Chop a teaspoon or so of thyme (Sage is also wonderful). Brown the butter just a little for extra depth of flavor, then add the shallot. Cook, stirring frequently, for about a minute or until translucent.
Add ¾ cup of the dry white wine and reduce by about half—about 4 minutes—seasoning with a little salt and pepper as it cooks. Stir in the chopped herbs and ½ cup heavy cream; let it reduce and thicken for about 2 minutes.
Cooking the Ravioli
Once the water is at a boil, cook the ravioli for 2–3 minutes until al dente; they’ll finish in the sauce. Cook wonton and fresh-pasta versions separately so you don’t mix them up. Transfer the pasta directly into the sauce with a splash of pasta water and cook for about 2 minutes more so they absorb that amazing flavor.
Time to Eat
Whether you made this dish with the wonton wrapper or your homemade pasta, they’re both delicious—it’s really just about how much time you have. I hope you get a chance to try this recipe.
Leave a Reply