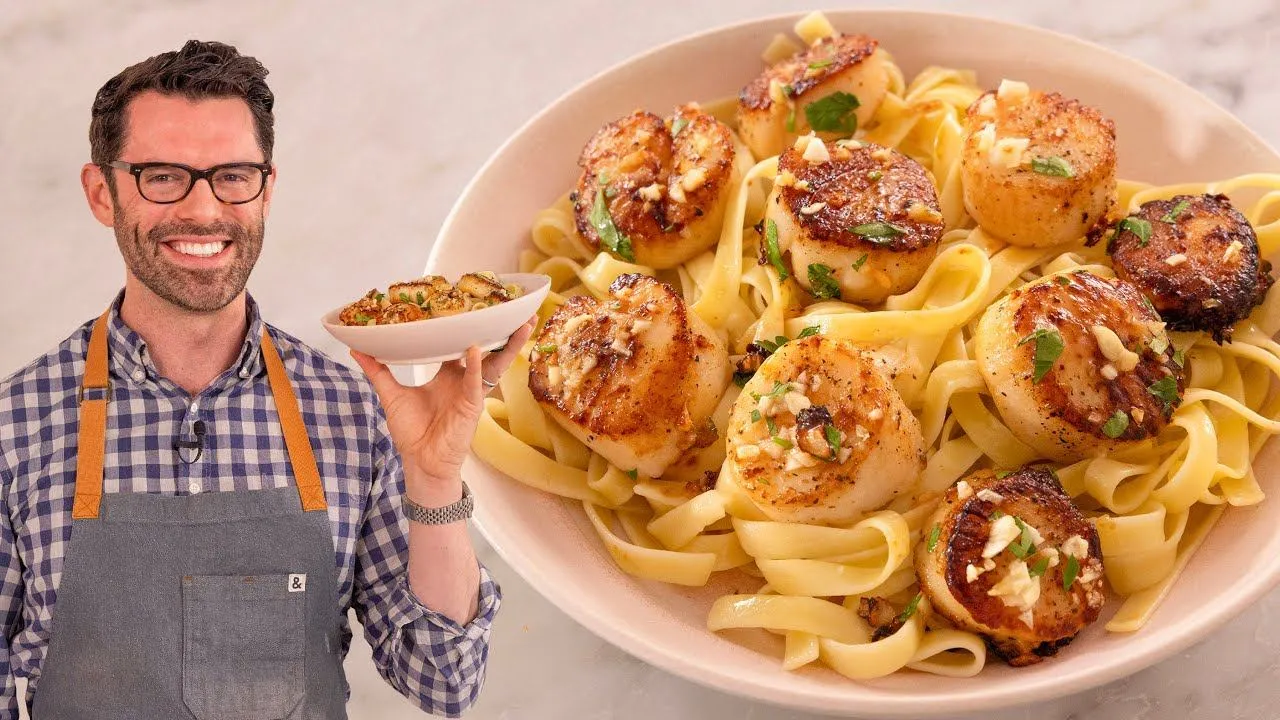
Amazing Seared Scallops Recipe
Hey, I’m John Cannell and today I’m showing you how to make perfect seared scallops. Let’s get started.
Preparing the Scallops
First off, grab about a pound of large, beautiful scallops—not tiny ones. They need to be really big so they sear beautifully. This is great, but there’s a small problem, and that’s the side muscle. It’s a little bit tough; you don’t want to eat it, so we’re just going to carefully remove it and set the rest of the scallop aside. Repeat that for the rest of your scallops, and then we’re going to pat them dry. The side muscle is just a little bit different in texture, darker in color, and it peels right off. Not every scallop will have one, but you’ll find the ones that exist and remove them.
Why Seared Scallops?
Seared scallops are one of my favorite dishes to make. It’s like the most incredible buttery, delicious, caramelized little wonderful nugget you pop into your mouth. Seared scallops are one of my favorite things to make because, one, they’re delicious, and two, it’s like zero time—it’s so easy—and it complements anything you put them in. This could go into a delicious seafood medley; it could go over some butter noodles like I’ll be doing today. It just rounds the meal out. There’s like zero effort in this; it’s so easy.
Freshness Check
These guys are all done. One thing that’s so important: scallops can be beautiful, wonderful little things, or they could be nasty, stinky seafood monsters, which means that they are old and bad, and you really shouldn’t eat them. Don’t punish yourself—you deserve nice things too. Always give them a sniff test, hopefully before you leave the market. These ones are perfect; they have like zero smell and a wonderful texture. You’ll also know that seafood is old and not your friend if you touch it and it’s kind of sticky or slimy. It should not feel like that; if it does, they’re old.
Drying and Seasoning
Pat them dry. When you sear anything or get a nice, wonderful caramelized texture, you need to remove the water that exists on there, so just grab some clean paper towels and pat them completely dry. Nice and dry—perfect time to season your scallops. I’m going classic with salt and pepper. You can use other things you enjoy, though. For the salt, one note: I like to use big, nice coarse salt. I don’t want to have super-fine table salt; I like a little bit of a crunch and punch from the salt, so I’m going to use at least a quarter teaspoon of salt on my scallops per side—so it’s like half a teaspoon total. I like things a little saltier when it comes to the scallops; you can use less if you want, it’s totally up to you. This is nice because you can see exactly how much salt is on the scallops. Distribute it evenly. I’m also adding a little bit of cracked black pepper right on top—just a smattering will do.
Choosing the Right Pan
These are all done, so now it’s time to grab a pan and get to work. Let me tell you, there are a couple of things that can go wrong when you sear scallops, but it’s so easy to do it right. The first thing that can go wrong: you’re impatient. They are underdone, they’re going to stick to the pan, they kind of get ruined, they pull apart—you’re like, “Oh, this is so difficult, why’d I try this?” Cook them until they come off the pan easily. That is the sear. The sear means everything is all sealed in; it’s gonna lift right off with zero effort. The other thing you can do is burn them and overcook them. Instead of being perfect and buttery on the inside and melt-in-your-mouth, they’re going to be kind of tough and chewy. Just be careful; you can do a little peek, a little test. I’ll show you everything, but just remember you’re looking for that perfect golden sweet spot—not underdone and pale, not overdone and burnt. The only equipment you’re using in this is a pan, so get a nice, heavy pan. It could be steel, it could be cast iron, but it should be a good one. Not a non-stick pan—please don’t do that to the scallops, don’t do that to your non-stick pan. Just get a regular steel or cast-iron one; it’ll be great.
Flavor Additions
My scallops are prepped. I’m not going to eat them plain, though—even though they’d still be delicious. I’m going to add in a little bit of garlic. My recipe calls for three cloves; that could mean anything from three cloves to six to twelve to a whole head. It totally depends on you and how you feel, so measure with your heart. Give them a nice mince. That’s really the only flavor I’m adding besides lemon, parsley, and butter—the classic combination for any seafood. Today I scored some jumbo cloves, so I’m using four. By the way, this recipe calls for one pound of scallops, and one pound of scallops is like three cloves of garlic. That’s what I will be eating. This is actually 1.26 pounds, and that’s barely my portion—I’m a little bit disappointed. I want to eat more, so if you want to have scallops for the whole family, I would just up this to however much you think people want to eat. It’s going to be a lot because they’re delicious and they go down really easy. Other than slicing a lemon and chopping a little parsley, that’s it for the prep work—ready to go.
Heating the Pan
Get these nice and hot. Place your pan over medium-high heat. I’m going to add about a tablespoon of oil, but it should be a high-heat oil, so most of them will work—just not extra-virgin olive oil. All those delicious flavors from not filtering things out will tend to give you some burning oil, so a high-heat oil, please—avocado, etc. Thick, liberal tablespoon. We want this oil to be nice and hot, almost to the smoking point, so it’ll be really dancing in the pan. You’ll see a lot of movement, and you’ll feel the heat.
Searing the Scallops
Scallops only cook for about three minutes per side, but the secret is the heat. It has to be hot. If you use a low heat, you’re going to be waiting for these scallops to be golden, but they’ll be completely overcooked all the way through—so hot is the way to go. I see a little smoke—add those scallops in, seasoned side down. You can do this in a couple of batches if you want; it doesn’t have to be all together. The only thing you have to do is leave your scallops alone. Don’t move them around, don’t check up on them too much—they need that time with the connection to the pan to really sear properly. All right, I might be crowding the pan just a little bit, but I really wanted to cook this in one batch. I cannot wait—they’re that delicious. All my scallops are in. While your scallops are searing on their first side, season their backs. We want flavor on all the sides. Give them the three minutes, and then we can check on them and look at the color. Don’t touch.
It’s been just about three minutes, and look at that—no issue, it just lifts right off. Turn it around, and now we’re going to keep going and flip the rest over. While the scallops are cooking on their backs, I’m going to add my two tablespoons of unsalted butter, just dolloping it in between the scallops. The butter is delicious, but it would have burnt at that high heat. I’m also going to sprinkle my garlic over. Oh my gosh, this smell is amazing. Use a spoon and just baste the scallops. This is optional—you don’t really have to do this. The scallops would have been delicious as is, but the addition of the butter and the garlic with the lemon juice and the parsley is gonna be amazing. Check the bottom—that looks nice.
Finishing Touches
Remove from heat, and I’m going to add a tablespoon of lemon juice over the top and garnish with a little bit of parsley. These scallops are basically perfect with a big helping of pasta, so serve it up, and they are ready to enjoy—perfect texture, amazing flavor, and this is a restaurant-quality dish that you can make at home in just a few minutes. I hope you get a chance to try this recipe.
Leave a Reply