How to Brown Butter
Hey, I’m John Canel and today on Preppy Kitchen, I’m going to show you how to make one of my favorite ingredients, brown butter. So, let’s get started.
Preparation and Storage
First off, grab your butter. You can brown as much butter as you want, so make a giant batch of it. Freeze some for later, save it in the fridge. It lasts just as long as regular butter will. Your brown butter will last up to 2 weeks in the fridge or for 3 months in the freezer, so you could definitely make a big batch and use it as you go.
Choosing Your Butter
You’re going to want to cube your butter so that it browns evenly. And there’s two choices. You could grab American-style butter. And you might not even know this is American butter. When you see the double-sized big bricks of butter, that’s a European style butter. And they’re fairly different. American butter is at least 80% milk fat. European butter is 82 to 90% milk fat. So even when they’re straight out of the fridge, European butter is much softer because there’s less of that watery content that’s frozen.
Safety and Technique
Basically, when you brown butter, there’s two things you have to be really careful of. One, burning the butter because if you cook it too much, it goes from being a beautiful caramel color filled with a rich nutty flavor to burnt. Burnt and bitter. We don’t want that. But the other thing is explosions. There is water in your butter and when you heat it up, it will expand, turn to steam and cause giant hot splatters and it makes a mess and it can burn you. So, I actually prefer using European butter for this because there’s less chance of splattering and injuring myself. But, I’ll show you both.
Getting Started
My butter’s chopped up. Let’s pop this into a pan and get it overheat. You’re going to want to place your pan over medium heat for this. Today I’m actually using my induction cooktop because my gas burners run so hot that things would be exploding. You’ll also see that I’m using a light colored pan. I would never use a dark non-stick pan for this because I would not be able to see the butter browning. I wouldn’t know when it’s burnt or when it’s perfect.
The Browning Process
Plop your butter in. Grab a spoon. And we’re just going to stir this up. Medium heat. So it’s like a six if you’re using induction. Browning butter is actually caramelizing the milk solids in the butter. So butter is not pure fat. There’s little milk solids throughout and that gives the butter a beautiful taste. Like plain butter, delicious. When you put those milk solids over heat, the sugar and the amino acids and the lactose will undergo something called the Maillard reaction, which is basically just a caramelization process. And it gives you a nutty beautiful depth of flavor.
Uses for Brown Butter
So, you can use brown butter in anything that butter is in. So, I could make my eggs in the morning with brown butter. I could have brown butter when I’m cooking some steak. I could have brown butter in my mac and cheese. It goes lovely in everything, especially desserts. So, brown butter for chocolate chip cookies, brown butter for frosting, brown butter for your pie crust. I’m going to show you how to use this a few different ways and you will be converted. It is just a game changer. It makes anything that you’re cooking or baking so much better just by swapping out the ingredients.
Flavor Amplification Hack
And if you like the brown butter flavor, but you want to amplify it, there is a hack for that. You can grab some powdered milk and add a teaspoon or two in or more depending on the size of your batch. And that’s just milk solids that you’re adding right in. So more of the milk solids will be caramelizing and you’ll get more of that nutty flavor. Something you can think about.
Monitoring and Finishing
Once your butter is melted, you’ll see little white specks all throughout. You’re going to keep stirring continuously because those white specks are the milk solids and they’ll settle to the bottom and they will burn. So you want to keep them moving. You’ll also want to have a bowl ready to pour this into. Once your brown butter gets to the point where it’s the perfect color and it smells amazing. If you just took it off heat, it would smell amazing and look perfect for one second as it continues to cook in the pan and burn with the residual heat. So, as soon as it looks right, or even a few seconds before you think it’s ready, just pour it directly into a bowl and it’ll start cooling and stop cooking.
American vs European Butter
As the butter heats up, you’ll hear gurgling and you will see foam develop. I’m going to show you this with American butter just cuz it’s so different. it will be completely covered in foam and you will not be able to see anything. So, you’ll have to use your spoon to really like vigorously move those bubbles aside and take a look at the milk solids below. If things are bubbling too aggressively, just reduce the heat.
Stirring and Color Monitoring
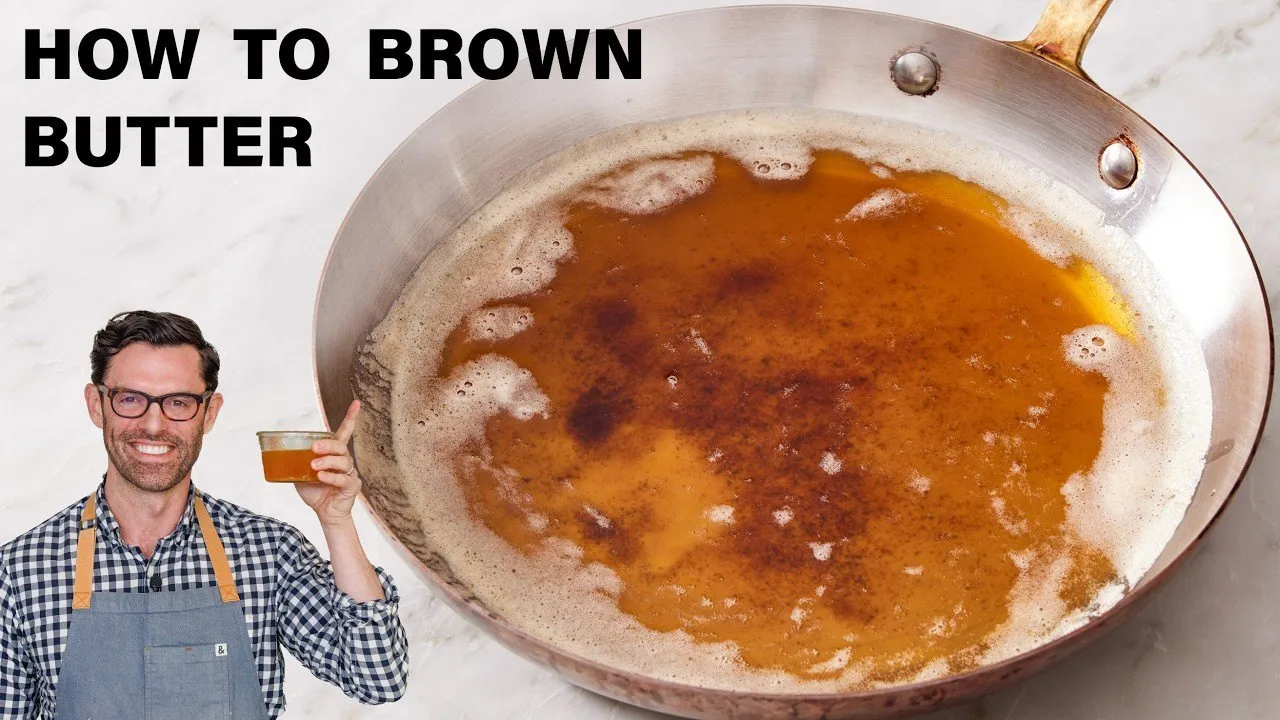
So, I’ve been casually stirring this slowly just as this cooks along. If I stop stirring, it’ll immediately begin bubbling aggressively. That’s when splatters happen. So, one, don’t do that. Two, you want the milk solids to keep moving. So, just keep moving, keep stirring, and really monitor the color. You can also swirl the pan if it’s hard for you to see, cuz that’ll help move the bubbles aside. The more you cook your butter, the more of this Maillard reaction you’re going to have and the flavor will intensify. So, if you want a really mildly nutty butter, just stop when it’s fairly light. If you want that flavor to be more intense, just keep cooking it until it’s like a medium caramel brown.
Seasonal and Culinary Inspiration
Brown butter, mashed potatoes, delicious. Like anything that you want to have more flavor in, brown butter. Also, in the fall, if you want that autumnal flavor to come through, swap your butter out for brown butter in every single recipe, and it’ll be delicious. Brown butter has been used in French cooking for centuries, and it’s not called brown butter in French. It’s called beurre noisette. My accent is horrible, but it translates to hazelnut butter, which just tells you the flavor is going to be nutty. It really is so lovely.
Knowing When It’s Done
I’ve been cooking the butter for a few minutes and now you can see the color is beginning to darken, but the milk solids are still fairly light. So, we’re going to continue cooking until I see that darker color come through. Just like that, the milk solids changed color in a few seconds. So, nothing happened for a few minutes and now they’re perfect. Take a look. Beautiful golden color. and you can see through the foam. Transfer this to your bowl immediately. Also, try your best to scrape out all of those milk solids at the bottom of the pan. That’s the flavor. You can see this is a stunning amber color. It’s beautiful. The smell is amazing. And if you want to use this for desserts, you could add like a teaspoon of vanilla in and just stir it after this cools down. and it’ll give you a lovely flavor throughout. Or just leave it plain and it could be totally versatile.
Cooling and Storage
My butter was so hot that it’s still cooking even though it’s in the bowl. So, just keep stirring it occasionally. You don’t have to stir constantly, but give it some occasional stirs. It’ll also help distribute the milk solids. As this cools, the heavier milk solids will all fall to the bottom, and that’s fine because you’re probably going to be whipping the butter up or, you know, cutting it into pieces. But if you stir it, it’ll just be even throughout. Your butter can now hang out on the countertop to cool. Once it’s cooler, you could use it in muffins or anything that calls for melted butter. You can chill it until it’s softened and then it can be whipped into frostings or you could freeze this and cut it into pieces and that could be used for pastries like making pie dough or anything that calls for cold cubed butter.
Final Thoughts
I’m cutting in some footage of me doing the same thing but with American butter just so you can see the difference. They cook very differently. You still end up with a really beautiful product. They’re both going to be delicious. So, it’s just a different process. The end product is going to be great. I hope you get a chance to make this easy and delicious ingredient.
Leave a Reply