How to Cook a Turkey
Hey, I’m John Canel and today I’m going to give you all my tips and tricks to cook the perfect turkey, so let’s get started.
Pre-heat and Thaw
First off, set that oven to 450. It needs to be nice and hot to seal the juices in that turkey and also give you that wonderful crisp skin. Your bird needs to thaw—at least, it’ll take a while—so start it maybe 2 to 3 days in advance. You do not want to cook your turkey ice-cold. Even if you bought a fresh bird, or if your bird is freshly thawed, it needs to warm up on the countertop for about an hour to get the chill off; it should be close to room temperature.
Dry the Bird
Once your turkey is completely thawed and warmed up on the countertop, drain any juices that were in the roasting pan and pat it completely dry. You want your skin to crisp up nicely, and water is your enemy here.
Prepare the Aromatics
I’m peeling and quartering one onion—that’s part of my aromatics. I went into the garden and I got the last of my sage and rosemary; it’s going to be kind of freezing soon so it won’t last long. You’re going to want 10 to 12 sprigs of rosemary, sage, and thyme. Today I’m using my thyme for something else. Cut a garlic head down the middle and that’s it for my chopping right now.
Make the Compound Butter
We have to make a wonderful concoction of butter to rub inside and out and really infuse a ton of flavor into this turkey. Grab 1 cup (226 g) of softened butter. If you’re using salted butter that’s totally fine—just reduce the added salt by like a heaping ¼ teaspoon. Your butter has to be softened because you’re basically making a compound butter. This is what I love doing every Sunday for my roast chicken that I make; I’ll add some tarragon and maybe some rosemary sometimes too, and really it works some wonders for getting flavor on top of the skin but also underneath—that’s where all the flavor soaks in.
To my softened butter I’m adding 2 teaspoons of salt. I like using sea salt in these recipes because it’s a nice mellow salt, and 1½ teaspoons of cracked black pepper. A brine is basically a long salty bath; there might be some sugar in there, there could be some spices as well. It’s really what you want to add, and it gives you a juicier and sometimes more flavorful bird. If you’re brining your bird, just drain it and pat it dry before you’re starting this; you do not want a wet turkey. Today I’m just doing salt and pepper, but you can add any spice blend you want to your compound butter. I love having some Cajun seasoning in here, you could have a Greek spice mix too—there are a lot of delicious things, and you can really make this your own because chances are you’re making this for a special day like Thanksgiving.
Work all that salt and pepper in there so it’s evenly distributed, and now it’s time to rub it under and over our bird’s skin.
Stuff and Truss
I’m just going to fill my cavity up with my garlic and onions while we talk. A lot of times they’re processed and the skin is ripped, and this one is so crazy—you can see the skin ripped all the way across the top, and that flap should be over here. The skin helps hold the moisture of the turkey in, so that’s really disappointing when it happens, but I’ll show you what to do to fix it.
Best to use your hands for this, and you’re going to start by going under the skin. So carefully, without ripping the skin, work your hands underneath the turkey skin to create cavities where we can add stuff in. You also want to go into the leg too—carefully—so you can add some butter there. A lot of people get intimidated by roasting a turkey, and honestly it’s the same as making chicken. If you ever make a roasted chicken it’s not very different; it’s just larger, and because it’s larger some things can happen—like it can get too dry if it over-bakes, maybe it doesn’t have enough flavor because you’re not going under the skin, and little things like that. So I really just want to show you how easy it is to prepare your turkey, even if you get a bum one like I did.
Okay, this is great, so now I can add butter in here and everywhere else—lots of flavor. I’m basically getting a big glob of butter under the skin like this and then working it in with my hands to mash it down. Don’t try and mash it under the skin; go over the skin and get a nice even layer.
Before I get to fixing these issues, I have my eight sprigs of rosemary and my eight sprigs of sage, and I’m just going to stuff that right in there along with your quartered onion and halved garlic head.
Now you’re going to add your compound-butter mixture all over the turkey—top and bottom—and you can see how well the butter is sticking because we dried the turkey skin off. I’m going to tie the legs together with kitchen twine. A lot of turkeys come with this plastic hook thing to force the legs together, and I do not like baking anything with plastic inside, so I took the little pop-out thermometer out and I took that plastic situation off as well.
So now I have this mess because of the processing of this turkey; I’m going to grab some needles and just pin it together and get us into a place where the skin should cover the turkey for at least most of the bake. The skin is really there to seal things in, and if your turkey is exposed it’ll dry out really quick.
The legs got tied together, everything is covered with skin now, and the pins are doing their job. We’ll see how it goes, but it’s better than nothing.
Build the Pan Sauce Base
In my roasting pan I’m adding the remaining two to four sprigs of rosemary and sage. If you’re using the juices that render out to make a delicious gravy, I like to add extra onions along the edge as well as one whole lemon, halved. It’ll give you a lot more flavor and your gravy is going to be that much better.
Add Stock and Season
Turkey’s almost ready, but I’m adding in four cups of chicken stock just to keep things nice and really moist. If you’re using a pan with a rack in it, your turkey will be above the rack and it’ll be kind of steamed. This turkey is right in the roasting pan and it’s going to have all those juices making the dark meat on the bottom so much more amazing. I’m adding a final sprinkle of salt just on top because I like the skin to be extra flavorful, and a little bit of extra pepper.
Roasting Schedule
This is ready to go into the oven at that screaming-hot 450 for about 15 minutes, then reduce to 325, and you’ll be cooking your turkey for 10 to 12 minutes per pound of bird. So if you bought a 12-lb turkey, that’s 120 to 144 minutes.
Baste and Tent
Every 30 minutes or so we’re going to baste our turkey. So just either grab your baster or a pastry brush and really soak the skin—all that rendered fat, all the juices—going to moisten it up and let it retain some of that juiciness that we love so much. This is one of my favorite jobs as a kid.
It’s my last baste—just one final bit of juiciness for this delicious turkey. If your turkey is a beautiful color but you’re worried it might get too brown at the tips, let’s just add some foil tenting. Like you’re making a pie, you’re going to slip these right on and then they’re not going to burn and singe; they’re shielded from the oven and the rest of it can get that nice juicy brown color and finish rising up to 165.
Check the Temperature
You can eyeball it, but I love using a thermometer and just temping it out. Go to the part of the thigh that’s going to retain the most coldness—so all the way on the inside but not touching the bone—and it should be reading about 165. You could take it out a little bit earlier; it might rise in temp, but I like to keep it at 165 just to be sure.
Rest the Turkey
My turkey’s out of the oven; I will be taking my tenting off—it did its job. Do not cut in yet; you want to wait at least 15 minutes, I like to give it 20. All these juices here are liquid gold—strain them out, make a gravy, it’s really easy.
Carve and Serve
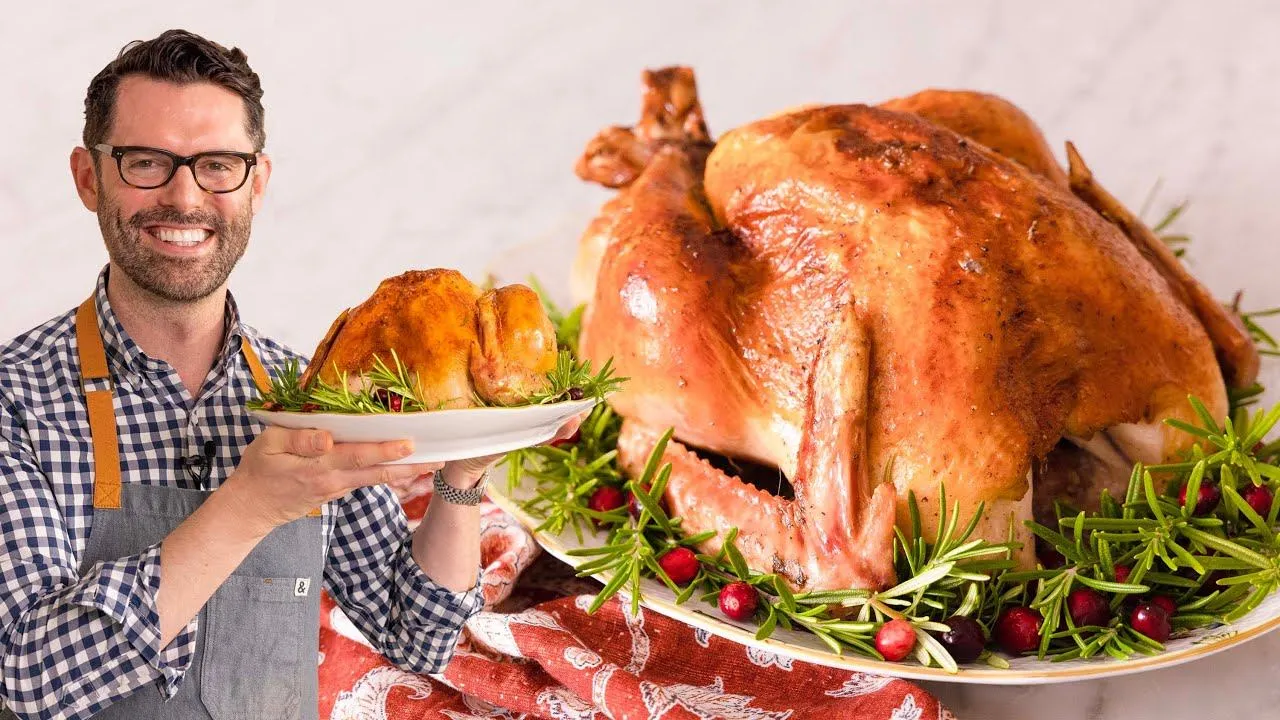
Grab your turkey, plop that onto your serving plate. I’m going to garnish this with some rosemary from my garden—it has the same aromatics we used inside and it looks gorgeous—and then finish it off with a smattering of fresh cranberries. Look how nice that looks; it says, “Hi, I’m your turkey and I’m here for the holidays.”
After your turkey’s rested, you’re ready to carve and enjoy. The cook always gets the first bite—oh my gosh, melt-in-your-mouth tender. Oh my gosh, it melts so nicely; it’s perfectly flavored, and the smell… I hope you get a chance to make this recipe.
Leave a Reply