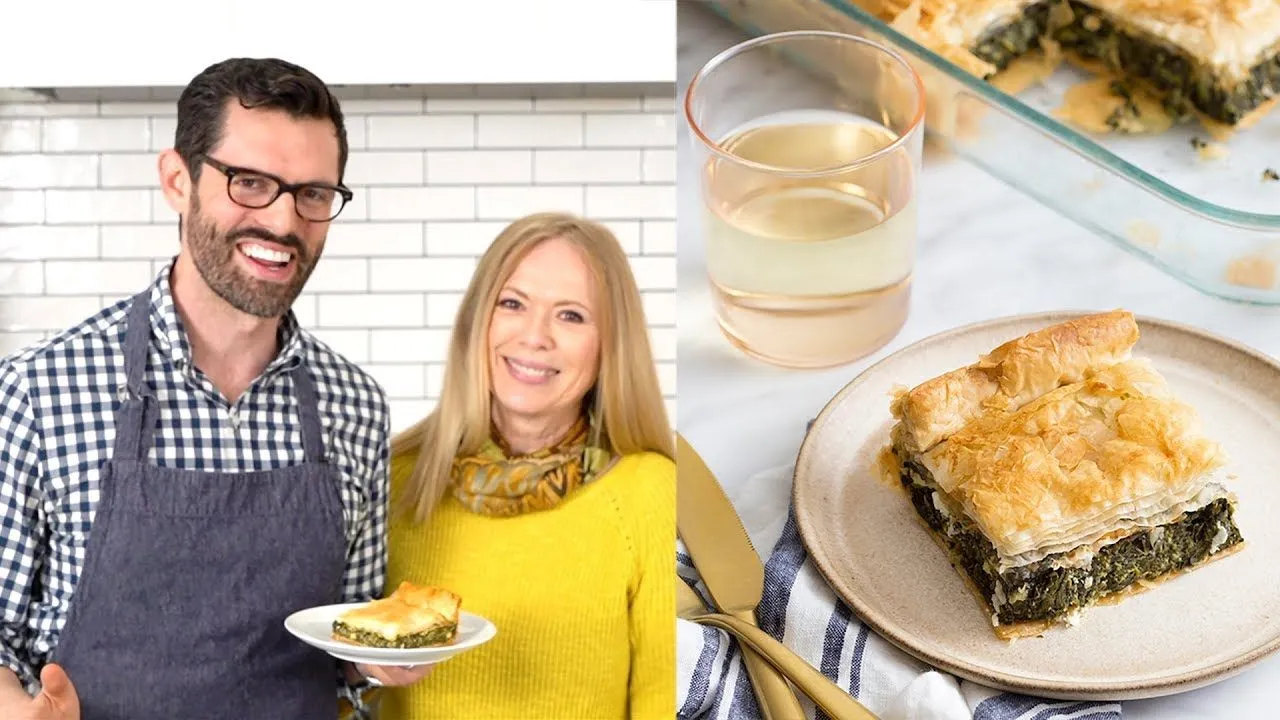
Spanakopita – Greek Spinach Pie
I have a very special visitor today. Hi Mom! Hi Joan! Today we’re making one of my all-time favorite—her favorite too—favorite dishes: Greek spinach pie, also spanakopita, and it is amazing. Really paper-thin, flaky, buttery layers of phyllo dough on the top, on the side, and on the bottom, but in the middle you have this light herbal—lots of dill—and onions, feta, lemon. Then we have lots of dill (what we’ve mentioned), lots of dill, some parsley, and spinach, of course. You’re gonna love this; I definitely guarantee you’re gonna love this. Let’s get started!
Preparing the Spinach
To make this recipe you could use a mountain of fresh spinach—beautiful, delicious, fresh, organic spinach—but that’s a lot of work because you have to cook it in batches. No one has a pan that’s this big that will give you that much spinach at the end; so much water is in there. So we’re gonna use frozen spinach. I think it’s basically just as good—it’s like 90% as good, right? The thing is that frozen spinach still has a lot of water in it. To get that water out you could use a nut-milk bag (which I have, but someone misplaced and I’m having a lot of feelings about it—I didn’t do it). You could also use a cheesecloth, a sieve like this, a tea towel, or paper towel. We’re gonna use some paper towels.
Mom, show us how to do this. So I’m gonna dump this out, and this recipe is calling for two and a half pounds of frozen spinach. You could use two pounds, you could use three—it’s kind of easy proportions, so you can move it around a bit. You can see all that water is coming out of there, and you don’t want your spinach pie to be soggy, right? Here we have the rest of our spinach. You can see all that’s left are these nice, much, much drier solids, and you don’t want too much water because it will make your spinach pie soggy. This is ready, and we can chop our greens.
Chopping the Greens
I’m gonna dump this out; I’ll chop it. Okay, so now we’re gonna transfer this back to our bowl to hang out for a while because we have some more chopping to do. Nice to have our green onions, or scallions—these are a favorite of mine. How much is this, do you think? It’s a bunch, but it’s almost two bunches. I think two bunches, chopped. This is great; I’m basically hanging out and hovering over her, and my mom’s doing all the work. I’m giving you moral support right now. I don’t mind at all, because the end product is so delicious—it’s vegetarian, and I love it.
Can you give me the dill? We get a look at all this dill—it’s about a cup of fresh dill. That’s like a cup of brandy on the portal—it’s such a wonderful mixture and the flavors with this finish and scallions. I just love scallions in any manner, but in this dish it goes really well. You can always prep it, chop it, and keep it in the freezer for another time. I have done that, by the way, so that I can always have it available. My mom has a very nice herb garden, so she grows all these things. She has a bumper crop of sage—I love sage. We have fresh flat-leaf parsley. I feel like it’s a bit less waxy; it has a better flavor—like a nice, light, grassy flavor in a good way. This is the one addition I asked for that she’ll allow, by the way, because I have done it before, and the flavor is always spectacular.
Preparing the Eggs
Okay, we’re done, so I’m gonna transfer this all into the bowl of our greens. Now we’re gonna go on to the eggs. A lot of recipes use eggs basically just as a binding agent, but you have a special family addition. Well, I find that you beat the egg whites first, and they get very voluminous, and then you add the egg yolks. When you mix it with the greens mixture, it makes a fluffier type—it’s more delicate. Great—six eggs. The yolks will just mix in, but the egg whites we’re gonna fluff up with a whisk attachment. I’ll use a standing mixer, but you could use a hand mixer too, and then we’re gonna fold that in.
We’re ready to separate our eggs carefully because we’re fluffing them up; we don’t want to get any yolks in there. My mom also uses her hands to separate egg yolks—clean hands, very soft, they’re not gonna break that yolk, and very organic. These eggs are so fresh you can feel it because the egg whites are very jelly-like. I’m gonna add this in here. I always begin on low to get those egg whites broken up, then gently increase the speed until you get to high, and we’re gonna fluff them up. These are real fluffy—look at this! No sugar in there, just fluffy egg whites—that’s a soft peak, actually. Alright, so next we add the yolks. We’ve got our delicious, rich, foamy eggs. You can go away for a minute.
Layering the Phyllo
We have our nice, foamy eggs, but now it’s time to do the base of the filo dough. You want some melted butter. If you can, you can clarify the butter—boil it to eliminate the dairy solids so they go away. If you use European butter, though, they don’t have the milk solids. This is filo dough; it comes in a roll in the freezer section. The main thing to remember is to defrost it at least overnight. We’re gonna lay it here, open it up. These are paper-thin sheets of dough. You can use a pastry brush; I’m using a giant artist brush, and this one works really well. We’re gonna brush the pan first—the butter is like glue, letting everything stick together, and it’s also gonna crisp the dough up to make it into a beautiful, flaky pastry.
Here’s our first layer—so thin you could almost read through it. If they have little tears, it’s not a big deal. You brush the butter really delicately; you don’t want to pour butter in there. For those of you who are more cholesterol-conscious, you could use olive oil as well. Now we’re going for the next layer. When you got friends over, it just was like the best thing ever—they were talking, they were loving it, there was some wine. You have to work fast with this because the filo dough does dry out, so you could cover it with a paper towel or two if you take a break. I’ve usually used a slightly damp paper towel, but my mom said not to because it’ll add too much moisture to the dough.
This is fastidious—layer, layer, layer, butter, butter, butter—but the prep work is actually super simple. When you make this dish, you often make two of them right at once because it’s kind of an assembly line. What my mom does—genius—is she has one to bake for the day of, and then she has one sneaky hostess one in the freezer that she keeps so at a moment’s notice she can put on this amazing dinner. This works really well in the freezer. Keep going—tears are not a big deal at all. The only thing that needs to be a little bit nicer is the very top layer. This is our last layer for the bottom. While she’s adding it in, I’m gonna fold the filo dough back up and make sure it’s totally covered so it doesn’t get exposed to the air—once it gets exposed, it dries out in a snap and turns into crumpled paper.
Mixing the Filling
Now we’re ready. We’re gonna set this aside, and we have our greens mixture. I need the big bowl. We have about a pound and a quarter of feta here. All the greens—crumble the cheese. We’re gonna put some lemon in—yes, ma’am. I want a whole lemon in here; remove those seeds. You could add more lemon—my brother and I are just addicted to lemon. That’s like half a teaspoon of salt. I’m gonna mix this up a little bit just so it’s not going on the feta. Salt and pepper to taste—I love pepper. So now we have our beautiful, fluffy, folded egg mixture. You want to do it last minute because when you incorporate all the ingredients, the eggs become more watery, and if you fold it in last minute, it can be more like a soufflé. That looks perfect.
Assembling the Pie
Now we’re ready to add it back into our baking dish and just spread it around. Let me help—move it around so it’s nice and even. You could also add in half a cup of freshly grated Parmesan cheese. What else could you do? You can put Gouda, or some fresh oregano. Now we’re back to our phyllo-dough operation. The way she’s doing it is very smart because she’s controlling the edge so it’ll have a nice, slightly layered appearance at the very end. I did mine totally different—there’s a choice. In mine, I folded the edge under almost like a pie crust, and it also looked nice as a rolled edge.
To make this, you have to keep warming the butter or keep it in a warming dish because as it cools it becomes thicker, and you’re actually brushing on more. We’re doing it my way for the top, leaving a lot of overlap coming off the edge, and then at the very end we’re gonna fold it under like a pie crust, which gives you a really neat look. This is going well. Do you need a couple more layers? You really want a nice, very flaky, puffy experience on top. For the folding process, we can rip off this corner here—we don’t need that much on the side. It’s kind of like trimming the pie crust when you’re about to fold the edges. Look how fast that was! This extra phyllo dough you can keep for later—maybe a little apple dessert. Wrap it up, set it aside.
Scoring and Freezing
Now my mom’s trick is to score this because if you cut into it after it’s baked—very flaky—everything flies away and shatters. If you score it beforehand, it makes the whole serving process so much easier. Eyeball it—we need one here, here, and I would like squares. If you make the servings bigger, that’s doing a few people for dinner; if you have a lot of people, you can make them smaller. This can almost be a main-course dish. When you do this, you do a seesaw motion and go up to the bottom. Have a very sharp knife—you don’t want to tear the phyllo dough, you want to cut into it. You could also use a utility knife.
This is done, and actually I’m gonna keep this one in the freezer so I can have a special dinner the next time we have guests over. Cover it super well—you don’t want any air getting in there because you’ll get freezer burn. Do you defrost or pop it in the oven frozen? Pop it in frozen—probably 75–90 minutes; check it after 60.
Baking and Serving
Look what we have here—oh my gosh, it’s just beautiful! Phyllo-dough scent, a copy to pie. This got tucked under here, and you can see mine was a little more raggedy because I was having sort of dry-phyllo issues, but it looks organic. It smells pretty good, right? Oh my gosh. You can serve this at room temperature, warm, or even cold—good for breakfast, lunch, and dinner. Let’s take a taste. Because it’s scored, look how easy it cuts—nice and fluffy layers. Cheers, thanks Mom! The lemon, the dill, the feta—those are the flavors. This is a really fun dish for when you’re hosting a dinner party and you want to bake and make something that’s easy but fun. People can help you butter, they can help you layer things, chop stuff, and then you pop it in the oven, and after a glass of wine or two it’s ready. You can make it smaller, and I would have this with salad—I always make them with a silent-killer salad.
Leave a Reply